
Summary: Dealing with online sales manually is overwhelming or even impossible. At What a Figure! Accounting we believe that Xero accounting software is one of the best solutions for effortless e-commerce bookkeeping. In this article, we will review possible ways of connecting your web store with Xero to make your life easier!
Connecting Shopify web store to Xero accounting software
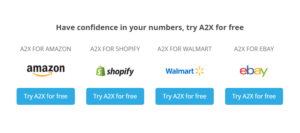
A2X for Shopify
A2X is more famous as an app for Amazon sellers (A2X launched on Xero’s app marketplace in 2015 ). However, in 2019 the A2X team launched A2X for Shopify.
Currently, it works also with Walmart and eBay.
There are 4 simple steps of setting up A2X for Shopify webstore:
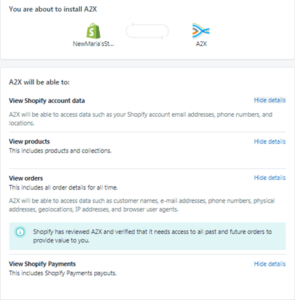
- Connect to e-commerce – in a single click you’ll need to connect A2X to Shopify so it can import your financial data
- Connect to accounting – connect A2X to your accounting system (Xero or QuickBooks are available), so you can post the financial data.
- Configure accounting and taxes – specify how you want to account for your Shopify sales and fees. This is how “Accounts and Taxes” screen looks like:
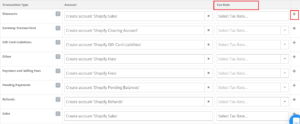 You should select your tax rate on sales and expense transactions in the Tax Rate column. Also, you can press”+” sign to reveal the specific transactions for each transaction type and customize your settings for complex accounting scenarios.
 - Post Shopify Payouts – Once you have connected to Shopify and your accounting system, A2X will import your Payouts. Then you will be able to post Payouts and do the reconciliation.
A2X for Shopify will automatically import a summary of all your Shopify transactions into Xero – sales, fees, refunds and other adjustments.
Afterwards, just reconcile those transactions against the Shopify payments in your bank account.
As a result, you can be sure that everything is correct in your books.
How does Veeqo-Xero accounting integration work
Another solution for connecting a Shopify webstore to Xero accounting software is Veeqo.
Veeqo pricing starts at $180.00 per month, per user. They do not have a free version but it offers a free trial.
Veeqo can help synchronize data across the most popular e-commerce sales channels — not only Shopify but also Magento, WooCommerce, Amazon, eBay, Etsy and Walmart.
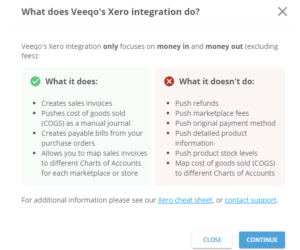
Keep in mind that Xero integration can only capture the information about incoming and outgoing money.
If you think you will need more functionality then another software may be more suitable.
Veeqo’s functionality includes:
- Converts e-commerce orders into Xero invoices.
- Synchronize every payment and purchase order.
- Automates profit calculations.
Veeqo captures order data from all your e-commerce stores or marketplace accounts and then push them directly to Xero for invoice creation. If you have a few web stores it’s possible to connect each of them to different Xero accounts (like different corporate entities). So orders from Shopify, WooCommerce, Magento, eBay and Amazon can be easily imported into Xero using Veeqo.
Making a purchase and calculating Cost of Sales in Xero
Also, Veeqo will create payable bills for your purchase orders. You should set cost prices for your products in Veeqo and every time you make a sale Veeqo will calculate what you paid for an item and create a manual journal between the inventory account and the cost of goods sold account in Xero.
The double entry for this is as following:
Debit – Cost of Goods Sold
Credit – Stock Account
This entry will decrease your stock value on the Balance Sheet and increase your COGS on your Profit & Loss in Xero. As a result, you get an accurate financial data showing in Xero.
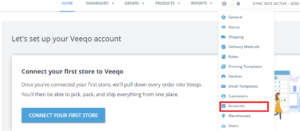
How to connect your Xero accounting to Shopify store with Veeqo
Hover over the Gear icon and click Accounts.
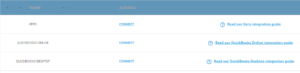
Then click the Connect button next to Xero
You will be re-directed to your Xero page, click the Allow access button.
After you have clicked the Allow access button you will be re-directed back to Veeqo where you will need to fill in your settings.
First of all, you should choose the corresponding accounts in Xero for sales and shipping (you charge your customers).

Let’s have a closer look at the settings options.
Sales invoice settings
- Invoice Status – how should the invoice be saved in Xero (approved?).
- Tax Option – should Veeqo orders be exported with or without sales tax.
- Order status – Veeqo will only export orders with these status values (paid, shipped, etc.).
- Payment Account – payments for orders should be saved to this Xero bank account.
Inventory settings
- Inventory Account – Veeqo will put the inventory value into this account. This will be displayed on your Balance Sheet.
- Cost Of Goods Sold (COGS) Account – as was mentioned previously, Veeqo will calculate what you paid for an item and create a Manual Journal between your inventory account on the Balance Sheet and your COGS account on the P&L.
- Inventory Purchase – when we sync a purchase order from Veeqo, this is the account used to create a payable bill for your supplier (usually its “Accounts Payable”).
- Purchase Invoice Status – the status of the supplier invoice to be synced to Xero.
- Purchase Order Status – Veeqo will only sync purchase orders that match this status. For instance, completed means you have received the stock from the supplier.
When you have finished, click ‘Save’. All done, you are ready to start a Xero synchronization!
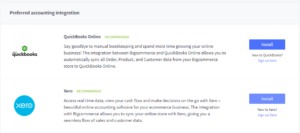
OneSaas: a universal solution for Bigcommerce, Wix and Squarespace web stores
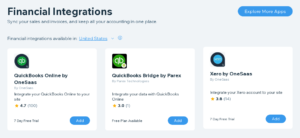
While setting up BigCommerce, Wix or Squarespace online store you can connect it to Xero accounting software straight away. In the App Store of these websore builders you can find Xero integration powered by OneSaas.
For example, on the main menu of the BigCommerce web store find the option “Store Setup”. Under this section, among others, you can find “Accounting” option which brings to the following page:
The process for Wix or Squarespace is pretty much the same. This is how the app store screen looks like in Wix:
Keep in mind that OneSaas can integrate with the following Wix Modules only:
- Stores
- Events
- Bookings
- Hotels
At this point of time, OneSaas doesn’t support other Wix products.
OneSaas proposes only 7-days free trial and its pricing varies from $19 to $299/month depending on the number of annually processed transactions.
OneSaaS installation: step-by-step
Once you click “Install” on your preferred accounting software integration (in our case it’s Xero), you should simply just follow the prompts.
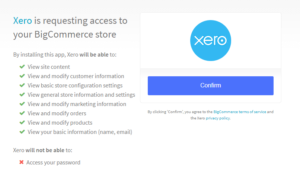
First of all, Xero will request access to your BigCommerce’s store information, which you should confirm:
After that, you should choose between synchronization options and turn on the Xero-BigCommerce integration:
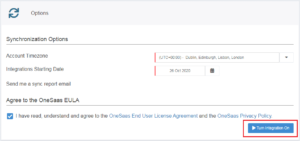
You will see a window with several options to choose from depending on your needs.
Make sure you tick the box “When an Order is created in your store, create an Invoice in Xero”:
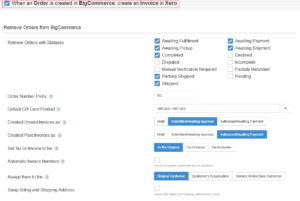
Furthermore, as you can see there are plenty of other options. At a first glance, it could seem tricky to integrate your accounting software correctly.
First of all, decide what orders and with what statuses you would like to see in Xero: paid, shipped, awaiting pickup, etc.
Another important step is to choose the default status of invoices sent to Xero (for both paid and unpaid): draft, awaiting approval or awaiting payment.
Also, you can decide whether to assign invoices to the original customer (the person/organization who placed the order) or to a generic online sale customer. In this case, all your sales will be grouped under one contact. This is quite a useful feature as it helps you avoid overloading your accounting software’s contact list.
Credit Note will be automatically created when order is Refunded or Cancelled
An important step of setting up Xero integration by One Saas:
- Matching tax codes between apps.
- Assign an Income Account for Sold Items: choose the default income account assigned to all items that are sold.

- Assign an Expense Account for Purchased Items.
- Inventory versus Non-Inventory Items. If you do not intend to track inventory within Xero, then you can select to create items as Non-Inventory Items within your system. All the products will still be matched by SKU/Code. Alternatively, if you do want to track stock levels, you can select the Inventory Items option.
Make sure you click on Save once you are happy with your changes.
We hope this article helped you connect your online shop with your Xero accounting software. If you have any questions or other suggestions, let us know in the comments below!